-
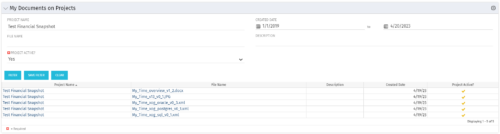 The My Documents on Projects portlet displays all of the documents the user has uploaded to projects. This portlet provides the user a single place to view documents across multiple projects without having to go into each project individually. This is efficient and time saving for the user. The filter allows the user to narrow their search by Project, File Name, Active Projects and Description. You may also narrow the view to display documents with a created date within a certain date range. Note: In v13, clicking the file name will link to the collaboration tab where the document resides.
 -
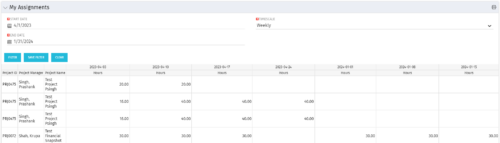 The My Assignments portlet will display the assignments for the logged in user - pulling data from the timeslices. It is used as a quick reference for the users to view their assignments across all of the projects. The portlet also displays work posted against the task, expressed in Actuals, and remaining work to be done, expressed as an Estimate to Complete (ETC). The Effort Variance reflects what the ETC variance is compared to the last current baseline of the project.
 -
The My Assignments portlet will display the assignments for the logged in user - pulling data from the timeslices. It is used as a quick reference for the users to view their assignments across all of the projects. The portlet also displays work posted against the task, expressed in Actuals, and remaining work to be done, expressed as an Estimate to Complete (ETC). The Effort Variance reflects what the ETC variance is compared to the last current baseline of the project.
-
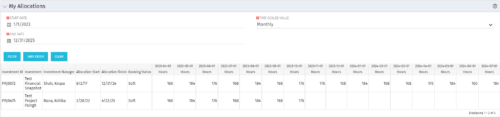 The My Allocations portlet will display the allocations for the logged in user - pulling data from the timeslices. It is used as a quick reference for the users to view their allocations across all of the projects where their allocation is greater than 0 for the specified date range the user wants. This will display both active and inactive projects.
 -
The My Allocations portlet will display the allocations for the logged in user - pulling data from the timeslices. It is used as a quick reference for the users to view their allocations across all of the projects where their allocation is greater than 0 for the specified date range the user wants. This will display both active and inactive projects.
-
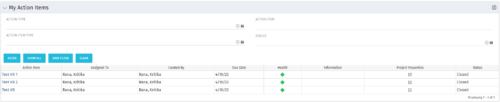 The My Action Items portlet displays all action items that are assigned or created by the logged in user. This portlet contains action item data including due date and a health stoplight to indicate when action items are late.
 -
The My Action Items portlet displays all action items that are assigned or created by the logged in user. This portlet contains action item data including due date and a health stoplight to indicate when action items are late.
-
The My Action Items portlet displays all action items that are assigned or created by the logged in user. This portlet contains action item data including due date and a health stoplight to indicate when action items are late.
-
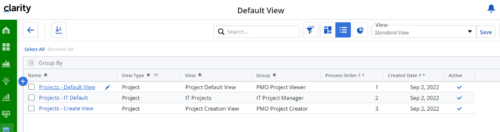
Manage default views for new users based on security groups or publish a view to all users in a specified security group. For more details, please refer to the detailed documentation.
-
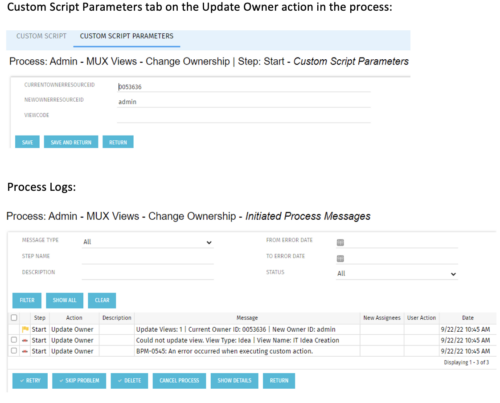 This is a standalone process that can be run by an admin to change the ownership of MUX views from a specified user to another specified user. The process contains a single custom script, which has the following parameters that must be updated prior to running the process:
- currentOwnerId (required): Resource ID for the current Owner (unique_name from srm_resources table)
- newOwnerId (required): Resource ID for the new Owner (unique_name from srm_resources table)
- viewCode (optional): Code for the specific view to update - leave blank if you want to transfer ownership for all views (odf_ui_views.code)
- Navigate to the process called Admin - MUX Views - Change Ownership.
- Navigate to the Start Step tab, Click on the Update Owner action, and click the Custom Script Parameters tab.
- Enter the Resource ID for the current view owner into the currentOwnerId parameter.
- Enter the Resource ID for the new owner into the newOwnerId parameter.
- If you want to update a specific view only, enter that in the viewCode parameter.
- Run the process via Organizer in Classic.


Copyright 2023 • Rego Consulting Corporation • Privacy Policy